Be sure to sign up for the weekly RV Travel Newsletter, published continuously every Saturday since 2001. Click here.
Showing posts with label GeeksOnTour. Show all posts

Thursday, April 14, 2016

Every Traveler Needs a Good Weather App, or 2!

When traveling by RV, you need to know the weather to decide:
  • When to stop driving for the day – if rainstorms are coming
  • Whether to cook out, or go out!
  • Whether to plan a week, or just overnight at a given location
  • When to start looking for a storm shelter!
This is a great use for a smartphone. It knows where you are, and it communicates with weather services. There are lots of Apps for reporting the weather, and I've tried several. I like the apps that have a moving radar video. It shows how bad the weather is and how fast it’s moving. All the Apps I've tried have this feature.
Yahoo weather is attractive since it uses photos from its photo hosting site Flickr to show you scenes from your current location.
Accuweather was good until recently when they removed!?? the feature that tracked your location and gave weather alerts for current locale.
Dark Sky is an eerily accurate, to the minute, weather forecaster for iOS, and Arcus is the closest competitor on Android.
They all have a radar screen and weather reports from your hometown.  But the most important feature in my book is an alert you can hear when there are weather warnings in your area.
Tornado Alerts: If you’re traveling thru tornado areas, you might also have a backup app like the Red Cross “Tornado.” It is supposed to scream out a siren sound that you can't miss.

The Weather Channel App

imageSo far, my favorite is The Weather Channel app from Weather.com. If you tap on the 3-line menu and choose settings, this is where you tell it that you want it to "Follow Me" - and give you severe weather alerts for your current location. Other apps really irritated me by blaring severe weather alerts for places I've been rather than where I was. This app didn't do that!
Settings for The Weather Channel App
In addition to that one, most important feature, The Weather Channel app has all the other information and goodies you'd expect.
  • An attractive home screen with large temperature display, sunrise/sunset times, and weather forecast
  • More detailed screen with Wind, Humidity, Dew Point, Pressure, UV Index
  • Hourly weather forecast
  • Daily forecast for a week
  • News videos from Weather Channel on TV
  • Radar map: if you tap on it, then tap the play button at the bottom, the radar will show weather movement for the past hour, OR the projected movement for the next hour!
  • Road Conditions map. This is nice - it colors areas where the road conditions are Windy, Wet, Foggy, Ponding, Ice, and Snow.
  • Social - you can report the weather in your area, or share a photo
  • Health - a pollen report for allergies, and a Cold and Flu report
One thing that may not be obvious is that, to get to all these other screens, you just scroll down. And, keep scrolling down. If you look for buttons, tools or options, you won't find the features. Just swipe up on the screen.
This is a free app, so be prepared for a lot of ads.
  • The Weather Channel by The Weather Channel 
  • Available on both Apple iOS and Android
  • Cost - Free
How about you? What weather app do you use and how do you like it?

Wednesday, March 2, 2016

Navigate with GPS by Taking a Picture!

imageThat’s right! Take a picture of a place you need to return to. Take that picture with a smartphone that has the GPS tagging feature turned on. Now, when you need to return, you can view the picture, see the GPS location and navigate back. Pretty slick.  Here’s the details:

  1. I used a Samsung Galaxy S5. This should work with any type of Android device as long as you have Google Maps version 9.21 or higher. It does not seem to work on an iPhone … yet.
  2. I used Google Photos to view the photo
  3. Before taking the picture, be sure you have the Location Tags (aka Geotags) turned ON in your camera’s settings. I leave mine on all the time.
  4. Now, when you take a picture, view it using Google Photos and tap the i (for Information) you should see a map with a marker.
  5. Tap the map marker and it will open Google Maps, then tap the Blue car button and it will navigate to the place where the photo was taken.

If you are an RVer – this is SO useful! For a long time now, we’ve been teaching people about the ability to save a location with a star in Google Maps, then you can navigate back to the star at any time. I still use this technique, but my Google Maps is getting to be covered with stars! This method of using a picture and navigating to it is great for situations like yesterday. We were staying at a large RV park for only one night, we really didn’t have a feel for the directions within the park at all. So, I took a picture of our motorhome on our site. Then, after going out to dinner, I opened the picture (using Google Photos) tapped the i, then tapped the map and we were getting directions back to our exact site. It would be really useful if you’re trying to return to a boondocking site in the middle of nowhere!

  • App: Google Maps and Google Photos
  • Author: Google
  • Cost: $0
  • Platform: This feature only works on Android right now
This article is by Chris Guld, of GeeksOnTour.com. To learn more about this and many other programs of use to travelers, visit her website and consider becoming a member in order to view all the tutorial videos. Some tutorial videos related to this topic:
  1. 403. Google Maps – Saving a Location with a Star
  2. 419.Google Navigation – Add a Stop

Also our What Does This Button Do? Episode 15: GeoLocating Photos, Waze app

Thursday, February 18, 2016

What’s that Tree?

imageAre you a tree worshipper? Do you love walking the desert after a rain and enjoying the flowers? Do you always wonder what kind of tree/flower it is you’re looking at?

Wonder no more! Check out this app called Like that Garden. All you do is open the app and take a picture of the plant you’re wondering about. It’s best if you can get a closeup of the leaves or the individual flower. I took a picture of this flower in our back yard, and the App comes up with photos of its own for potential matches. I can tap the i for more information about their matches and, if I’m convinced, I’ll check the confirm box. I Love It! I have been known to refer to this flower as a ‘Crown of Thorns’ – now I can say it with confidence. I learn that it is also known as a Christplant, and the latin name is euphorbia milii. I’ll just stick with Crown of Thorns!
image

It wasn’t obvious at first how to use a picture from my gallery rather than taking a new one, but it’s there. Once I tap Search, it comes up with a camera to take a new pictures, but there is a thumbnail of the latest photo in the lower left corner. When I tap the thumbnail, I’m taken to my gallery where I can select any existing photo and it takes me back to the Garden App. The photo I choose is of a complete tree however, and I’m not confident that their matches are correct. It’s just too hard to match. I’ll have to go back and get close up to the branches and leaves to be sure.
  • App: Like that Garden
  • Author: Just Visual, Inc.
  • Cost: $0
  • Platform: Android; iOS
This article is by Chris Guld, of GeeksOnTour.com. To learn more about this and many other programs of use to travelers, visit her website and consider becoming a member in order to view all the tutorial videos.

Thursday, February 4, 2016

How to Prevent the Fake Friend Scam on Facebook

Most RVers make good use of Facebook. It is such a quick, easy, and effective way to stay in touch with far-flung family and friends. If you’ve ever received a Facebook Friend request from someone you know is already a friend, you’ll know what we’re talking about here, and learn how to prevent it happening to your friends.

The Scam:

Three friends of mine have had imposters make up Facebook accounts using their names, profile picture, and other information that was public on their page. Then, they harvested my friends' public list of friends, and sent fake friend requests to them, instructing them to delete the "old" (REAL) accounts due to some phony made up computer problem. In the most recent, the imposter claimed the real account was lost to a Trojan on her Facebook. There is no such thing as a Trojan on Facebook but many people fell for it anyway. In every case...the imposter took the profile of a female friend in her late 50s or early 60s who is very trustworthy, admired, and who has friends who also look trustworthy (trusting!) and in every case, was able to convince people to befriend the imposter account. Once the imposter has trusting friends, he or she can send spam or scam posts out to them.

The easy way to prevent the above scam from happening to you is to make your Friend List private – the default is public which is how the imposters get the names.  This must be done on a computer, the option doesn’t exist on phone and tablet Facebook apps. Here's a tutorial video for Geeks On Tour members: 398. Facebook – Keeping Friends Private

  1. View your Profile and click on the tab for Friends
  2. At the top right of your friend list, you’ll see a pencil icon – click on that and choose Edit Privacy
  3. Under “Who can See My Friend List” click the dropdown arrow and choose anything but Public.  I recommend “Friends except Acquaintances”, but you may even want to make it “Just Me.”
  4. Here is the official Facebook help page on “Who can see my Friends Section of my Timeline?

image

This article is by Chris Guld, of GeeksOnTour.com. To learn more about this and many other programs of use to travelers, visit her website and consider becoming a member in order to view all the tutorial videos.

Thursday, January 21, 2016

Let Alfred Watch Your House

While not exactly a “travel” app, if you have a house that will be empty when you’re traveling, you’ll like Alfred!
Alfred is a free app and the only hardware it needs is an old smartphone or tablet that you’re not using anymore. Your house will also need a good, always on, Internet connection with WiFi. It started as an Android only App but recently released an iOS version. The Android version has a few more features, but both work.
  1. Using an old phone or tablet, connect to WiFi and download the Alfred App from the play store. Install Alfred and log in using your Google account.
  2. Set that phone in a location where it has a good view of what you want to watch, plug it into power and turn on the Alfred app. This is your Camera – just leave it on, using Alfred, all the time.
  3. With your current Android phone, install Alfred and log in to your google account so you can view what the Webcam is seeing – this phone is your Viewer.
That’s it! And it’s Free! Alfred also handles sound, it could be a baby monitor where you hear the baby crying, or you could shout at burglars! Note: the iPhone camera does not support 2-way talk. It also has motion detection and can send a notification to your phone when something is happening.
image
This article is by Chris Guld, of GeeksOnTour.com. To learn more about this and many other programs of use to travelers, visit her website and consider becoming a member in order to view all the tutorial videos.

##RVT750, WP

Thursday, January 7, 2016

Measuring Distance with Google Maps

I’m always planning my travels and asking, I wonder how far it is from ___ to ___? Or, if we want to drive about 200 miles today, where does that get us? Google Maps is my tool of choice for anything map related and it can answer both of these questions.

To go from X to Y, is how many miles?

To ask that question, I use the directions feature of Google Maps. Tap the directions button imageto get started. On a computer, you’ll see that button at the top left of your screen next to the search box. On a smartphone, you’ll see it in a blue circle at the bottom right. On either one, clicking it will open up a From and To field. On your phone it assumes you want the “From” location to be your current location, but you can just tap on that and type somewhere else. On a computer, you can click the map to set a From or To location.
So, if I want to know how many miles it is from Essex Junction, VT to Ship Bottom, NJ, it will look like the screenshots below. Google reports that it is at least 388 miles.
Note: if we were using this to navigate, I would use exact addresses or locations, but just to get a ballpark I use city names.
On a Computer:
image

On a Phone:
image

If I go X miles, where am I?

388 miles is way too far for us to go in one day in our motorhome! We prefer more like 200 miles. We’ve been doing this a long time, and we’re lazy! The question I want to ask now is, “If we leave from Essex Junction and go 200 miles in the general direction of Ship Bottom, where are we? Google calls that “measure distance” and it does it with a straight line, so this won’t be accurate with turn by turn, it will be ‘as the crow flies.’ I wish I could ask, “following the route above, show me 200 miles from the start.” The only program I’ve ever found that can do that is Streets & Trips from Microsoft, and it has been discontinued. So I will make due with Google’s approximation.

On a Computer: Right click on your starting point and choose the option to Measure Distance. Now you can click another point and see the distance written next to the line that is drawn and also in the Measure distance dialog box that appears at the bottom of the screen.  You can drag that one point until you see 200 miles, or you can click to set multiple points and get a closer approximation to actual distance.
  image
On a Phone: You need to start from a pin. You get a pin to show by tapping on named location, or longpress anywhere on the map. Once a pin is visible, you will see a name for that location at the bottom of the screen, swipe up on that bottom area to reveal an information panel – at the bottom of the information panel, you should see a link to “Measure Distance.” Tap on “measure distance” and you will now see a black circle. You can’t drag the circle, you drag the map and the circle stays in the center. You can pinch and zoom the map and the bottom of the screen will report the miles represented. You gotta play with it a bit to get the hang of it. Once you got it, it’s easy. Both the computer and the phone report that a 200 mile straight line from Essex, lands us somewhere between Kingston and Beacon, NY. Knowing that the true distance will be longer than the straight line, I’ll start looking for campgrounds in the vicinity of Kingston.
  image

 This article is by Chris Guld, of GeeksOnTour.com. To learn more about using Google Maps and many other programs of use to travelers, visit her website and consider becoming a member in order to view all the tutorial videos.

##RVT786

Wednesday, December 23, 2015

Make your Travel Map for 2015

I love having an easy to see overview of all my travels for the year. I’ve made one for every year that we’ve been RVing.
It started out as a simple graphic with a line to represent our travels, Then I started using Streets and Trips and taking a screenshot.
Then Google Custom Maps came along, now called Google My Maps. It’s free and really quite easy to make a map with lots of detail.

Samples of our Travel Maps

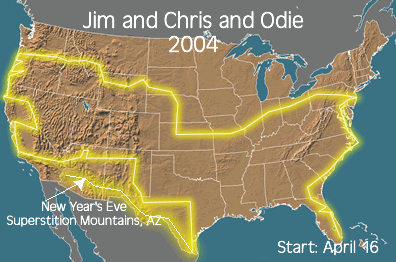
2004
2005
image
2010
image
2011
image
2013
image
2014
image

It has gotten more sophisticated over the years. Now, with the free Google My Maps, I can see the overview, but every marker is clickable and I can have pictures, videos and text that you see when you click a marker. You can see all 11 of our yearly maps on our Blog’s Map page.

2015 Travel Map

Here is our map for 2015 … over 10,000 miles in the RV, plus trips to Europe, Bahamas, and Cuba! If you click on the picture below, it will take you to the full map, then try clicking on individual markers – like Madison, Wisconsin, or Cienfuegos, Cuba. You will see photos and perhaps links to blog posts. What a fabulous way to record all the details of your travels in one place!
image
Now, using Google My Maps, every marker can tell a story.

How to Make a Map

To use Google’s My Maps, you start with the regular Maps.Google.com. It’s best to use the Chrome browser, but not essential. What is essential is that you must be logged in to your Google Account. Check the upper right corner of your screen and see the circular icon – usually your face – that represents the account. If it’s not you, or it says, “Sign In” then click there and sign in with your Google account. Then click the 3-line menu, and then My Maps. You will then be able to open one of your existing maps, or create a new one.
image

Once you’re there, you’ll see a little toolbar.
image
To make a marker, you click on the 4th button over – the marker tool – then click the place in the map where it goes. That will open up a dialog box where you can add further information about that spot. To draw a line, you use the next button over, then drag on the map to create the line.
Your map is being saved automatically as part of your Google Account. There is also help available on the same menu.

Planning Ahead

Google My Maps is not the only way to do this, we like using the Roadtripper.com app and website to sketch out our plans.
image

Show us your 2015 Map!

Where did you travel in 2015? If you have a map, please leave a comment with a link so we can see! And, let us know what program you used.

Thursday, November 26, 2015

Google Maps and Offline Navigation

imageby Chris Guld, GeeksOnTour.com
I recently heard about a new way to download Google Maps so they are accessible offline. I’ve used offline Google Maps before, but we couldn’t search or navigate. It’s search and navigate that makes Google Maps so useful! Now, I’m reading that maps saved offline can be used for search and navigation. Hooray! So, I immediately opened my Google Maps to try it. It didn’t work. I couldn’t find the “Download” button anywhere and that is what the instructions told me to use.

Update Google Maps to get Offline Navigation

Ooops, I hadn’t yet updated my Google Maps app to the latest release. Once I did that, the offline map feature was available. To do the update, you go to the Play store on an Android device, tap Menu, then My Apps. Any apps that have an update waiting will be listed at the top. Tap the App, then tap Update, then OK to accept necessary permissions.


Our last trip where we were often offline was the UK. So I tried searching for London, UK –> tap on London, UK at the bottom of the screen, the next screen shows a “Download” button and an outline of the size of the map section that I can download. I can get all of London, but not all of England in the downloaded map. It’s a large download, you need to use free Wi-Fi or at least be aware of the data that will be used. While you have the blue outline on the screen you can expand and adjust the part of the map that is being saved. Notice there is also info on how large the download will be. For Colorado, I can get the whole state from East to West, as a slice along I70. That download will be 1.5 GB. If I just capture the Denver area, it’s 500 MB.

So then, I searched for Havana, Cuba because that is where our next trip is! No Download button appeared. Ok, what did I do wrong this time? A little more research and I found the small print, “Downloading offline areas isn't available in some regions because of contractual limitations, language support, address formats, or other reasons.” Darn! Cuba must be one of those areas.
But, next time we find ourselves exploring roads thru the Rocky mountains, you can bet we’ll download the offline map and we will have Google Maps Search and Navigation available even when we don’t have a data connection.

iPhone and iPad Google Map Features “coming soon”

The ability to search and navigate offline is first rolling out to the Android version, the iOS version has been announced, but is not yet available.

Want to Learn More?

Episode #14: Doing Updates

wdtbdad

Episode #26: Google Maps

Thursday, November 12, 2015

Highway Travelers–Learn what Facilities are Available at the Next Exit

iExit
iExit LogoWe are fulltime RVers, and this past week we’ve had to travel cross-country, starting in Nevada and ending near Washington, D.C. It’s no surprise that we’ve stayed on the Interstates most of that trip, so we decided to check out iExit (iexitapp.com.) If you’re familiar with the book “Next Exit” you know the basic concept, a listing of all services available at each Interstate Exit. Now, put that on an iPhone/iPad or Android device so that it knows where you are, make it easy to simply tap on an Exit number to show all the details, and you have an extremely useful app.


Campgrounds are Listed

I expected to get good info on gas stations and restaurants, what I didn’t expect is to get nearby campgrounds as well. I have been using Allstays RV and Camp for most of our campground-locating needs, but, on this trip we were interested only in campgrounds that were very close to the Interstate Exits. iExit came thru.
image
The App
Now, if it would only combine the GasBuddy price information, I’d be all set! Such a bother to have to switch back and forth between apps! Woe is me.


Thursday, October 29, 2015

Facebook Groups for RVers

by Chris Guld, GeeksOnTour.com

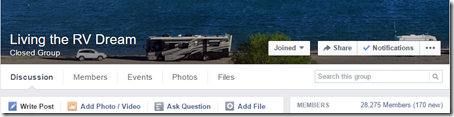
Did you know that the majority of RVers are on Facebook? As a Facebook member, you can take advantage of the Group feature. You can join an existing group, or make your own. I belong to a few RV-related groups. One is Roadtreking, a Public group where I can keep up with our friend Mike Wendland and his community. Another group is Living the RV Dream – a very active group with 28,000+ members. If you want to get immediate feedback on any RV-related question. I noticed a post yesterday that was concerned about their dog being allowed in RV parks since it was a pit bull mix. Within 20 minutes they had a dozen responses from people with first-hand experience! That’s useful information.

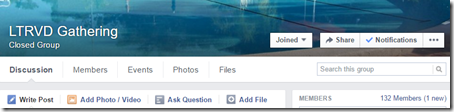
The third one is LTRVD Gathering. This is a small group that was created specifically as a communication device before, during, and after a rally. What a great way to easily communicate to the whole group and give each person in the group a way to share information and ideas.

You can search for RV groups on Facebook by using the search field and typing RV, then click the option for Groups, or here’s a link to the search (you must be logged into Facebook for this link to work.)

image

image

image

What is the difference between a Public and a Closed Group?

If a group is public, anyone on Facebook can see the posts there, but only a member of the group can create a post. If a group is private, anyone on Facebook can see the list of people who are members of the group, but you can’t see any of the posts unless you are a member. For more details about the different types of groups see the official Facebook help page on Privacy Options for Groups.

How do you become a member of a Group?

imageIf you find a group you want to join, you should see a button for Join Group at the upper right of the page. You may have to wait for an admin to approve your membership – it could be in 5 minutes or it could be a few days depending on how active the group and its admin is. Once you are part of a group, you will be notified anytime someone posts. You can control those notifications by clicking on “Notifications” at the top of the page (on a computer) and choosing the option you want.

How do you Make a Group

Anyone on Facebook can make a group. Probably the easiest way to get started is to visit a current group that you belong to – using a computer – and click the 3-dot menu at the upper right. At the bottom of the list, you should see “Create New Group.” On a mobile device, you can tap the 3-line menu at the upper right, scroll down to the Groups section and, at the end, you will see “Create a New Group.”

Thursday, October 1, 2015

Cellular Internet Connections: It’s Not Just the Signal, it’s the Speed

Where most people look for pretty trees at the campground, we look for pretty cell towers!

by Chris Guld www.GeeksOnTour.com
We travel all over the country in our Motorhome and we depend on our website, GeeksOnTour.com, for our living. Internet connections are very important to us and we rely on Verizon thru our Android phones to provide that connection. We also live-stream a smartphone educational show every week. It’s called What Does This Button Do? and we do it from our motorhome. In case you are not aware, “Streaming” and “Internet Hog” are synonymous!
I have to be reminded that some people use their phones to make phone calls! Just to be clear, we’re only talking about Internet … Data … connections in this article. Voice is a different topic which may or may not be affected by the same factors.
Most people judge their cellular Internet connection by simply looking at the signal bars on their phone. 1-2 bars = bad; 4-5 bars = good. But that’s not always true.
image

Using Ookla Speed Test App

Signal strength is only one measurement, and in my opinion it is not the most important one. We have been in places where we were seeing only 1-2 bars, yet our Internet performance – the speed – was very good. We have also seen 4-5 bars and had low speed. We use the Ookla Speed Test app to check our speeds. We’ve seen download speeds ranging from .2 Mbps to 74. But, those numbers don’t always correlate with the signal strength.
image
In the image above you can see that the signal strength is not that great, yet the speed is VERY good! And, we’ve seen the results go the opposite way as well; where the signal strength has been registering 5 bars, yet the speed is <1Mbps.
When we pull into an RV park now, we drive around with our cell phones out and Ookla Speed test running. At each possible site, we’ll do a speed test. We were recently at the Thousand Trails park in Hershey, PA and we planned to be there for #48 of our What Does This Button Do?, so we really needed good Internet. When we pulled into the park, our signal strength was registering only 2 bars … of 3G. Not good. There were some areas where we saw no signal at all. Then we found one area with 2 bars of 4G, so we started an Ookla speed test and saw less than 1Mbps of speed. We thought we would need to leave and find another park, but we kept looking at other sites and doing speed tests. We found one, where Ookla registered 2-3 Mbps both up and down, so we parked. Surprisingly, we were able to do our show just fine.

Not all Cell Towers are Equal

Realize that the signal strength bars are simply measuring how strong the signal connection is between your device and the nearest cell tower for your service provider. So, there may be times when you are very close and have good signal strength, but it’s an old tower with outdated equipment. A better connection doesn’t help if what you’re connecting to isn’t any good. And vice versa – you may have a weak connection but if the cell tower you are connecting to has the latest and greatest technology, you may still get good results. Realize that “Old” and “Outdated” may be measured in months!
imageCellular technology is very fast-moving. If you want to learn more about this, we recommend the excellent book: RV Mobile Internet Handbook by Chris Dunphy and Cherie Ve Ard of Technomadia. You can find the book and much more on their website RVMobileInternet.com.

The Numbers Don’t Tell the Whole Story

You can’t just look at the numbers and know how good your Internet connection is. I thought we would be unable to do our streaming show from the Hershey campground based on the numbers, but it went just fine. There are so many factors in this complex technology.  It’s your experience that counts. Browse to a website; did it load fast or are you still waiting? Try to play a Youtube video; does it start right away and continue straight thru or does it stop every few seconds to buffer? Try uploading a video; does it complete or does it die halfway through? If you’re not getting the results you want, there are signal boosters that will help, but only IF the problem is signal strength. If the problem is cell tower equipment quality, you may need to move!

Wednesday, September 2, 2015

Fish Predictor

Maybe sometime, along with all your RV travels and camping, you’ll find a place to go fishing as well! If you want to be sure you’re picking the right time to go fishing, this app can help. It’s called Fish Predictor by Sportsman Tracker.
image
It knows all about the sun and the moon and can tell you when the fish will be running by consulting its solunar tables. It also keeps track of the weather and the tides and condenses all this information into a 1-5 star rating to tell you the best times to go fishing! If you’re fishing inland waters, Fish Predictor uses the USGS water database of lakes and streams to give you river flow rates and water temperatures. You also won’t have to guess about the rules and regulations for your catch because it is all provided in the app.
You can enter several different locations and ask for alerts to get you moving when the time is right. We were told about this app by our friend, Mark, on Long Beach Island, NJ. Mark has been fishing these waters for many years and he catches a lot of fish. Using this app to tell him the best day, he caught over 30 fish in one outing last week.
image
Don’t just go fishing … go Catching!
App: Fish Predictor by Sportsman Tracker
Platforms: Android, Apple iOS
Cost: Free

Thursday, August 20, 2015

Minute-by-Minute Weather

by Chris Guld, GeeksOnTour.com

imageHave you ever been getting ready to hitch up and go but you looked at the sky and saw dark clouds? You wonder, should I rush and get hitched up right now? Or, if I wait a half hour, will it pass?

No need to wonder any more, the Dark Sky app will let you know. It is a hyper-local, eerily accurate, down-to-the-minute predictor of precipitation. It also gives wind speed, dew point, barometric pressure, world maps of weather, sunrise/sunset. Forecasts give a range of predicted precipitation at different times of day.

We wanted to go for a walk, but noticed the dark clouds gathering. We consulted Dark Sky and it said the rain would start in 40 minutes. We planned to walk for 35 minutes, so we went. Sure enough, 5 minutes after we were back, the rain started!

Dark Sky was covered as one of our Apps of the Week in the Geeks on Tour “What Does This Button Do?” shows. If you’d like to see it, here is a link to the place in episode #36 where it is demonstrated.

Dark Sky is not available on Android, a similar app for Android is Arcus weather

imageApp: Dark Sky by Jackadam
Platforms: Apple iOS
Cost: $3.99 on iPhone.

Thursday, August 6, 2015

Using Allstays Camp & RV to Find Membership Parks

by Chris Guld, GeeksOnTour.com

We love the Allstays Camp and RV app on our smartphones and use it all the time to find a place to stay in our RV. I know many of you use it as well, but I wonder if you know about its Advanced Filtering?

If you use this app, you probably know that you can use the Filter feature and just check off the items that you want to see on your map. For example, I put a checkmark next to Independent campgrounds, Army Corps of Engineers parks, and Cracker Barrels, but not next to RV Dealers or Sams Clubs. There’s only so much display room on the map, and I don’t want it to get too cluttered. Each of those categories has its own icon on the map so I can tell an Army Corps park from a Cracker Barrel. It’s quite nice.

2015-08-06 21.12.37We are members of Thousand Trails and like to stay in their parks whenever possible. Thousand Trails parks show up on Allstays along with Independent Campgrounds – they don’t have their own icon, or a separate category on the Filtering screen.

Or do they?

I was lamenting that there was no box to check for Thousand Trails parks, when someone showed me how to do it! So I want to pass along the favor.

Use the Advanced Filtering section.

After tapping on Filter, you’ll see a line for Advanced Filtering (Cumulative.) On that screen you’ll see lots more choices, including various clubs like Good Sam, Escapees, Passport America, and Thousand Trails! So, I click the checkbox for Club-Thousand Trails, click Done, and then my map shows only Independent campgrounds that are Thousand Trails. 

Now, how do you get all the other items back when you want? Get back to the Advanced Filter screen and Clear your checkmarks by tapping the green ‘Clear’ button. Notice that the Advanced Filter is cumulative. I know that word ‘cumulative’ sounds like it should show more but in fact it shows less because it’s the filter that is cumulative … adding one filter to another means less data gets thru. More means less – got it? The more you play with it, the more it make sense – just try it! You’ll like it!

Thursday, July 9, 2015

Like Bike-Riding? You’ll Love Rails-to-Trails

Trains need fairly level grades. The tracks can slope gently up or down, but there are no sharp changes. They often follow rivers. Both of these factors make old train tracks wonderful places to convert to paved paths for bike riding! And, there are lots of old train tracks that have indeed been converted to bike trails. It’s called Rails to Trails and you can find all of the possible bike-riding trails by visiting the website www.railstotrails.org/

 image

As you travel these United States, you’ll do well by using the smartphone app called Traillink to find all the great Rails to Trails where you can take a wonderful bike ride.

image

The TrailLink app is available for both Android and iPhone. It’s free to install and search for trails near you, or search for trails near some other destination.

image

If you want to see the detailed map of the trail, that will cost you one credit. You see, Rails To Trails Conservancy is a non-profit organization. If you enjoy their efforts, you’ll want to support them.

image

Each map will cost you .50 – $1.00 depending on how many credits you buy. Or, you can fully support them and get unlimited access to maps for $29.

image

App: TrailLink by the Rails to Trails Conservancy
Platforms: Android, Apple iOS
Cost: Free to search, maps cost credits

Thursday, May 28, 2015

Pictures on Coffee Mugs and Mouse Pads

by Chris Guld, www.GeeksOnTour.com
I love my travel photo coffee mug!

When I’m bleary-eyed in the morning and just drinking my first cup of coffee, it gets the day started right to be staring at personal photos of our favorite adventures. You can put your photos on all sorts of things using services like Shutterfly, Snapfish, Walgreens and even Walmart. I’ve taught people how to do this several times using Picasa on the computer. But, what if you only use your phone and tablet anymore?

Shutterfly App for Apple and Android

With nothing more than your smartphone, you can now upload pictures to Shutterfly and order them on coffee mugs, pillows, mouse pads, tshirts, and many more. Just go to your Play Store for Android or the App Store for Apple and download the App Shutterfly. Once you open it, you’ll need to set up an account. It’s free, just enter your email address and a password. Now you can upload pictures from your phone or tablet and they will be available for Shutterfly to print on anything you’d like.
This time, I ordered a mousepad so I can remember this beautiful spot where we are parked in the Florida Keys! It’s $6.99 for the mousepad, then another $6 for shipping! If I waited and saved up some more things to order, I could get free shipping on orders over $39. But, hey – seeing this beautiful picture every time I look down at my mouse …. priceless!


Thursday, May 14, 2015

My Fitness Pal: An App to Track your Diet

We’ve been living on the road in our RV for over 11 years now. I know the reality of this lifestyle now. One big misconception that I had was that life on the road would be an active life. We would be hiking, biking and kayaking everywhere we went. We would also be eating all sorts of fresh foods from farmers markets. We were leaving our friends and weekly parties behind. We would be fit and healthy as a natural byproduct of our RVing lifestyle.

NOT!

If anything, life on the road can be even more sedentery and unhealthy than life in a stick and brick home. We’re still working so we sit at our computers a lot. When we’re moving it’s in a vehicle sitting in comfy seats. At least in a stationary house, you can find a preferred walking route and do it every day. On the road, you never know exactly where you are or what is around. Yes, there are ways to find out with Maps and other online resources, but you need to do that every time you move. And, don’t think that you’ll be without your friends and won’t do any partying! We meet more friends on the road than we ever had staying put, and the basic unit of camaraderie is Happy Hour!

You have to make a conscious effort to eat right and stay fit while living in an RV just like living in a house. We find that an app called MyFitnessPal can help. Fill in a few goals – like number of calories per day, and amount of weight to lose over time, and MyFitnessPal will help you stay on track. You do need to make the effort to write down what you eat, but MyFitnessPal makes it relatively easy. You can search for a food in its database. It even has things like Publix Cobb Salad, or TGIFridays Baby Back Ribs in the database. And, as you enter your normal foods, it’s really easy to select them from your “My Foods” list. You can also create “Recipes” so the next time you have your famous Chicken Cacciatore, you don’t have to figure out the calories. Very easy to add foods and track your daily calorie intake, including scanning barcodes for packaged foods.

image

MyFitnessPal is an App on your smartphone or tablet. It works on Apple, Android, and Windows devices as well as being a website you can access from your computer. Regardless of what device you’re using, once you’re logged in, all your information is there. Add a friend to your information and set it to share your food diary so this friend can help you stay on track.

It also can connect to other apps like Runkeeper or your Fitbit, and it will subtract calories used for exercise from the calorie intake of food.

We demonstrated MyFitnessPal in the App of the Week segment of What Does This Button Do? Episode 38. The whole show is about 40 minutes, but the segment on MyFitnessPal is only a few minutes and it starts at 32minutes and 30 seconds on the timeline. Check it out.

image

Thursday, April 16, 2015

Google’s My Maps and Custom POI Files

I’ve written about Google’s My Maps in this blog before. As much as possible I am now using Google’s My Maps for planning, and recording, our travels. Something I like to see when working on a plan is the location of all our Thousands Trails membership parks.
Below is a screenshot of what it looks like on my phone. Each brown square has a TT for Thousand Trails. This is stored in a ‘layer’ on my map and I can turn it on or off at any time.

image

I got this data from the Discovery owners website. I used the Google earth format.
You can also create your own data set using Excel. For example, here's a list I made of all the presidential museums – we’ve visited every one of them! Notice I did not even enter a complete address. Since this information is being imported to Google Maps, it can find the place based on the name and the city. Of course, the more detail you provide, the more accurate the markers will be.

image

Once the data is imported to your map, you can even personalize the icons and make the labels visible.

2015-04-16 19.40.45

To make a new map and import a data file in My Maps:

  1. Go to Maps.Google.com on a computer browser – preferably Chrome.
  2. Click the empty search field and you should see My Maps link appear. Click on that and then Create.
  3. Under a new Untitled Layer, you will see a link to Import. Click that and navigate to the file of data you want to import.
  4. Depending on the file format, it will ask you which column(s) contain the information for the location of the marker. In the Presidential Museums example above, that would be both columns. Next, you will be asked which column contains the name or label for the marker. In this example it would be the first column with the name of the President.

There is a lot to learn about using Google My Maps. If you are a member of Geeks on Tour, there are several tutorial videos on My Maps. If you want to join Geeks on Tour, you can use the coupon code: rvtravel for a 20% discount.